
Anthony Conti Roofing Roof Leak Repair in West Palm Beach Expert Guide
A roof leak in West Palm Beach rarely stays small for long. Afternoon storms, wind-driven rain, salt air, humidity, and intense sun can turn one loose flashing seam or cracked tile into stained drywall, soaked insulation, mold concerns, and structural damage.
Anthony Conti Roofing brings three generations of roofing experience to that exact problem. That matters because leak repair is not guesswork. A visible ceiling stain may start several feet away from the actual roof opening. Water follows rafters, fasteners, underlayment seams, and wall transitions before it finally shows up indoors.
This guide explains the most common causes of roof leaks, how to recognize warning signs, what a professional repair process looks like, and why skilled repair often saves more money than a quick DIY patch.

Three generations of roofing experience make a difference
Roofing knowledge is built over time. Materials change, building codes evolve, and weather patterns test every shortcut. A company with three generations in the roofing industry has seen the same leak patterns repeat across decades, often under different roof systems.
That experience helps with three key parts of leak repair.
Finding the real source
The stain inside the home is rarely the full story. A seasoned roofer knows how water moves under tile, across shingle courses, around flashing, and through small penetrations. That trained eye helps avoid fixing the wrong area.
Matching the repair to the roof system
A flat roof, tile roof, shingle roof, metal roof, and low-slope addition all need different repair methods. Using the wrong material can trap moisture, break down in the sun, or fail during the next heavy storm.
Protecting the rest of the roof
Good leak repair does not create a new weak point. Proper removal, preparation, sealing, fastening, and cleanup all protect the surrounding roof from damage.
Anthony Conti Roofing’s long history in the trade gives homeowners a practical advantage. The team is not just looking for a hole. They are reading the roof as a system.
Common causes of roof leaks in West Palm Beach
West Palm Beach roofs deal with conditions that are tough on every roofing material. The sun dries and expands surfaces. Rain tests every seam. Wind can push water upward under roof edges. Salt air can wear down metal components over time.
Here are the leak sources professionals often check first.
Damaged or slipped roof tiles
Tile roofs are common in South Florida, but tiles can crack, shift, or break under impact. A broken tile does not always mean immediate water entry, because the underlayment below provides much of the waterproofing. Still, exposed underlayment wears faster under sun and rain.
Signs to watch for include:
Cracked or missing tiles
Tiles that look uneven or out of line
Small pieces of tile in gutters or on the ground
Leaks that appear after strong wind or heavy rain
Worn underlayment
Underlayment sits below the visible roof covering. On tile roofs, it is one of the most important waterproofing layers. Over time, heat and age can cause it to dry out, split, or fail around fasteners and seams.
A roof may look fine from the street while the underlayment is no longer doing its job. That is one reason a professional inspection matters.
Flashing failures
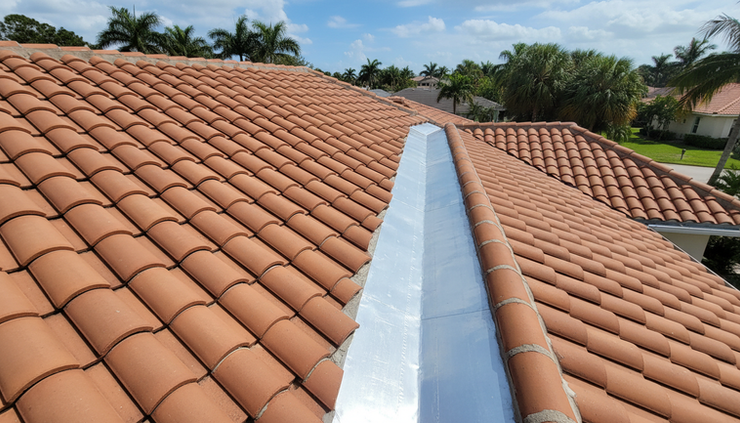
Flashing protects the places where the roof meets another surface or feature. You will find it around chimneys, walls, skylights, vents, valleys, and roof edges.
When flashing loosens, corrodes, cracks, or separates from sealant, water can slip into the roof system. These leaks often show up near walls, ceilings, and corners.
Roof penetrations
Every pipe boot, vent, exhaust opening, satellite mount, and skylight creates a break in the roof surface. These areas need proper sealing and flashing. Sun exposure can dry out rubber boots. Sealants can shrink. Fasteners can back out.
A small gap around a vent can lead to a steady leak during strong rain.
Clogged gutters and poor drainage
Water needs a clear path off the roof. Clogged gutters, blocked valleys, and debris buildup can force water to sit where it should not. On low-slope areas, standing water can speed up wear and find small openings.
Palm fronds, leaves, and windblown debris make this a common West Palm Beach roofing issue.
Storm and wind damage
Wind does not need to remove a whole section of roofing to cause a leak. It may lift shingles, shift tiles, loosen ridge caps, or open flashing seams. Wind-driven rain can then enter from angles a roof does not face during normal rain.
After a strong storm, a roof may need inspection even if the damage is not obvious from the ground.

How to identify a roof leak before it spreads
Some leaks announce themselves with dripping water. Many do not. Early signs are often subtle, especially when water enters slowly or only during wind-driven rain.
Look for these clues inside the home:
Brown or yellow ceiling stains
Bubbling paint or peeling drywall tape
Musty smells in one room or hallway
Damp insulation in the attic
Water marks around vents, recessed lights, or skylights
Mold-like discoloration near ceiling corners
Outside, warning signs may include:
Broken, missing, or displaced tiles or shingles
Rusted or lifted flashing
Debris piled in roof valleys
Sagging gutters or overflows during rain
Cracked sealant around vents or pipes
Granules collecting in gutters from aging shingles
A simple way to track a suspected leak is to note when it happens. Does it leak only during heavy rain? Only when wind comes from one direction? Only after days of steady showers? That information helps a roofing technician narrow the search.
Avoid climbing onto the roof to investigate. Wet roofing is slippery, and tile can break under foot traffic. Photos from the ground can help, but a roof inspection is safer and more accurate.
The professional roof leak repair process
A dependable repair follows a clear process. The exact steps vary by roof type and leak source, but the goal stays the same: find the entry point, stop the leak, protect nearby materials, and verify the repair.
1. Inspect the interior signs
The process often starts inside the home. A technician checks ceiling stains, wall damage, attic spaces, vents, and nearby roof penetrations. The location of the stain helps form a repair plan, but it does not confirm the source by itself.
Water may enter high on the roof and travel down before it appears indoors.
2. Examine the roof surface
Next, the roofer inspects the roof covering, flashing, valleys, penetrations, and drainage paths. On tile roofs, this may include looking for cracked tiles, shifted pieces, and exposed underlayment. On shingle roofs, the inspection may focus on lifted tabs, missing granules, nail pops, and damaged flashing.
A careful inspection helps separate the symptom from the cause.
3. Trace the water path
Experienced roofers know how to follow water movement. They review slope, roof transitions, attic framing, and the pattern of stains. If needed, controlled testing may help confirm the leak source.
This step is important because repairing only the visible damage can leave the true opening untouched.
4. Remove damaged roofing materials
Once the source is found, the crew removes the affected roofing material with care. That may mean lifting tiles, removing shingles, exposing flashing, or opening a small section of the roof assembly.
The goal is to access the failed area without damaging sound materials nearby.
5. Repair the waterproofing layer
This is the heart of the repair. Depending on the roof, the team may replace underlayment, install new flashing, reseal a roof penetration, correct a valley issue, repair a flat roof membrane, or replace damaged components.
The repair materials must be compatible with the existing roof. In South Florida heat, cheap sealants and temporary patches can fail quickly.
6. Reinstall and secure the roof covering
After the waterproofing layer is fixed, the visible roofing is replaced or reset. Tiles, shingles, panels, vents, or other parts should sit properly so they shed water as designed.
A repair should not look careless or leave raised edges that catch wind.
7. Clean the work area and review the repair
A professional crew checks the area, removes debris, clears loose materials, and reviews the completed repair. If interior damage occurred, the homeowner may also need drywall, paint, or insulation work after the roof is confirmed watertight.
8. Recommend prevention steps
Good roof repair includes guidance. The roofer may suggest gutter cleaning, tree trimming, maintenance inspections, or monitoring an aging roof section. These steps help reduce repeat leaks.

Why professional repair beats a DIY patch
A tube of sealant may look like a quick fix. Sometimes it stops visible dripping for a short time. The problem is that roof leaks are often deeper than the surface.
DIY repairs can create hidden risks.
They may trap moisture
Sealing over wet materials can lock water inside the roof system. That moisture can damage decking, insulation, and interior finishes.
They can hide the real source
A visible crack may not be the entry point. Water may be entering higher up, then exiting through the crack. Covering the exit point does not solve the leak.
They may void product protections
Some roofing materials and systems require approved repair methods. Improper work can affect warranties or future insurance conversations.
They can create safety hazards
Roof work involves height, heat, slippery surfaces, fragile tiles, and sharp materials. One misstep can cause injury or more roof damage.
They often cost more later
A temporary patch may allow water to keep spreading. By the time stains return, the repair may involve decking, framing, insulation, or mold cleanup.
Professional repair is not only about tools. It is about judgment. A skilled roofer knows when a small repair is enough and when a larger section needs attention.
A roof leak should be treated as a water intrusion problem, not just a roof surface problem.
What Anthony Conti Roofing looks for during leak repair
Anthony Conti Roofing approaches leak repair with the perspective of a multi-generation roofing company. The inspection looks beyond the obvious opening and considers the roof’s age, materials, drainage, past repairs, and exposure.
A thorough leak repair visit may include checking:
Roof area | What the technician looks for |
Valleys | Debris, worn underlayment, open seams, poor water flow |
Flashing | Gaps, corrosion, loose edges, failed sealant |
Tile or shingles | Cracks, missing pieces, lifted sections, impact damage |
Penetrations | Split boots, loose vents, exposed fasteners |
Gutters | Clogs, overflow patterns, drainage against fascia |
Attic areas | Stains, damp insulation, daylight through roof openings |
This type of inspection helps create a repair plan that fits the real condition of the roof. It also helps homeowners understand whether they are dealing with an isolated leak or a sign of a larger roofing issue.
Case studies that show how leak repairs succeed
The following examples reflect common roof leak repair situations in West Palm Beach homes. They show how proper diagnosis changes the outcome.
A ceiling stain that started far from the leak
A homeowner noticed a brown stain in a bedroom ceiling after several storms. The stain sat near the center of the room, so the first assumption was that the leak came from the roof directly above it.
A roof inspection found the entry point higher up near a flashing transition. Water had traveled along framing before soaking the ceiling drywall. The repair involved correcting the flashing area, replacing affected underlayment, and resetting nearby tiles.
The key lesson was simple. The visible stain showed where water finished traveling, not where it entered.
A cracked tile that exposed aging underlayment
Another homeowner found broken tile pieces on the patio. There was no active dripping inside, but the roof area below the broken tile had been exposed to sun and rain.
During inspection, the underlayment showed wear around the damaged section. The repair included replacing the affected waterproofing, installing sound tile, and checking surrounding tiles for movement.
The homeowner avoided waiting until water reached the ceiling. Early repair kept the problem smaller.
A recurring leak around a vent
A leak returned every time rain arrived with strong wind. A previous surface seal had been applied around a vent, but the water still entered during storms.
Professional inspection found that the sealant had cracked and the vent flashing was not properly shedding water. The repair required removing the failed sealant, addressing the flashing detail, and restoring the roof surface around the penetration.
The repair worked because it fixed the assembly, not just the visible gap.
When to call for roof leak repair
Call a roofing professional as soon as you see signs of a leak. Waiting can turn a small repair into a larger project.
Reach out for service when:
A ceiling stain grows after rain
Water drips from a light fixture or vent
A musty smell appears after storms
Tiles or shingles are missing or cracked
Flashing looks loose, rusted, or separated
Gutters overflow near roof edges
A storm has recently passed through the area
If water is entering near electrical fixtures, avoid touching the fixture and shut off power to that area if it is safe to do so. Then contact the right professionals for electrical and roofing help.
A reliable repair starts with the right roofer
Roof leaks demand careful diagnosis, not guesswork. In West Palm Beach, the mix of heat, humidity, salt air, heavy rain, and storm winds makes professional roofing knowledge especially valuable.
Anthony Conti Roofing brings three generations of roofing experience to roof leak repair in West Palm Beach. That background helps the team identify hidden leak sources, choose the right repair method, and protect the roof system from further damage.
The best time to fix a leak is before it spreads. A prompt inspection, a clear repair plan, and skilled workmanship can protect the home, reduce stress, and extend the life of the roof.


Comments